Exterior Restoration and Soffit Repair Ruckersville Virginia:

Stabilization and Restoration of Chimney Support, Soffit, Roof Opening, and Siding In Ruckersville VA

The chimney fully removed.

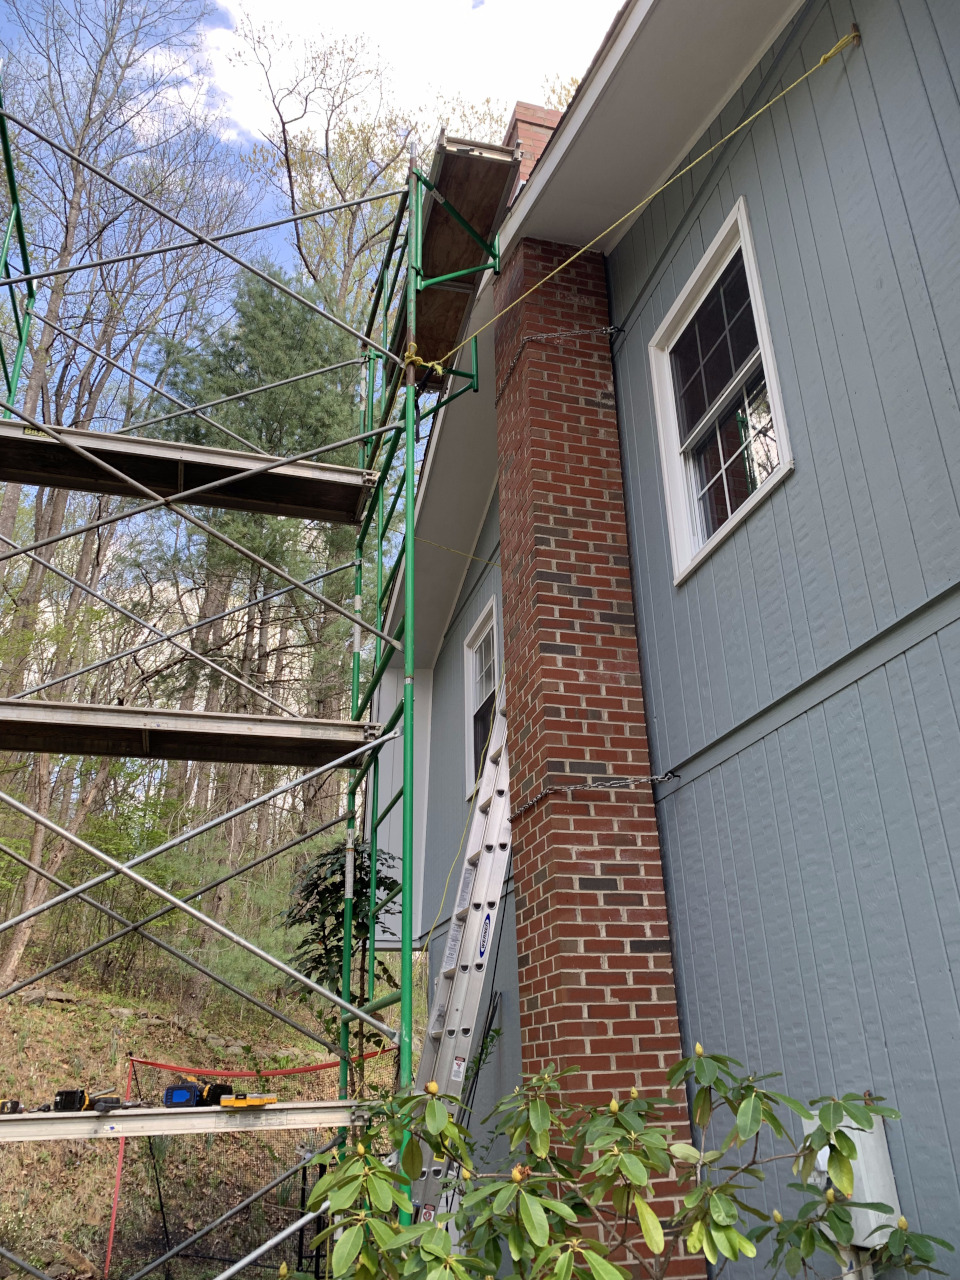
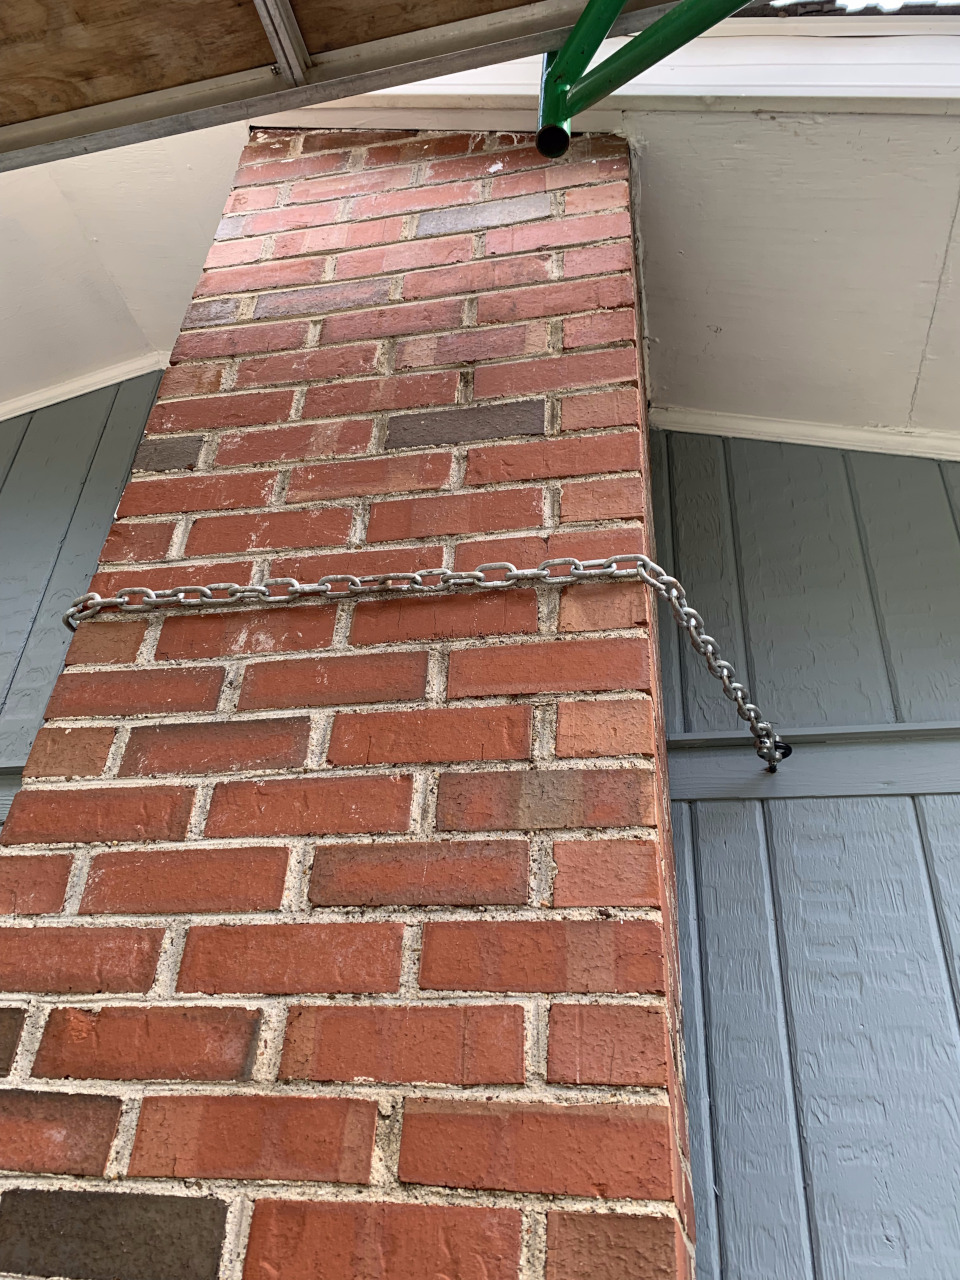
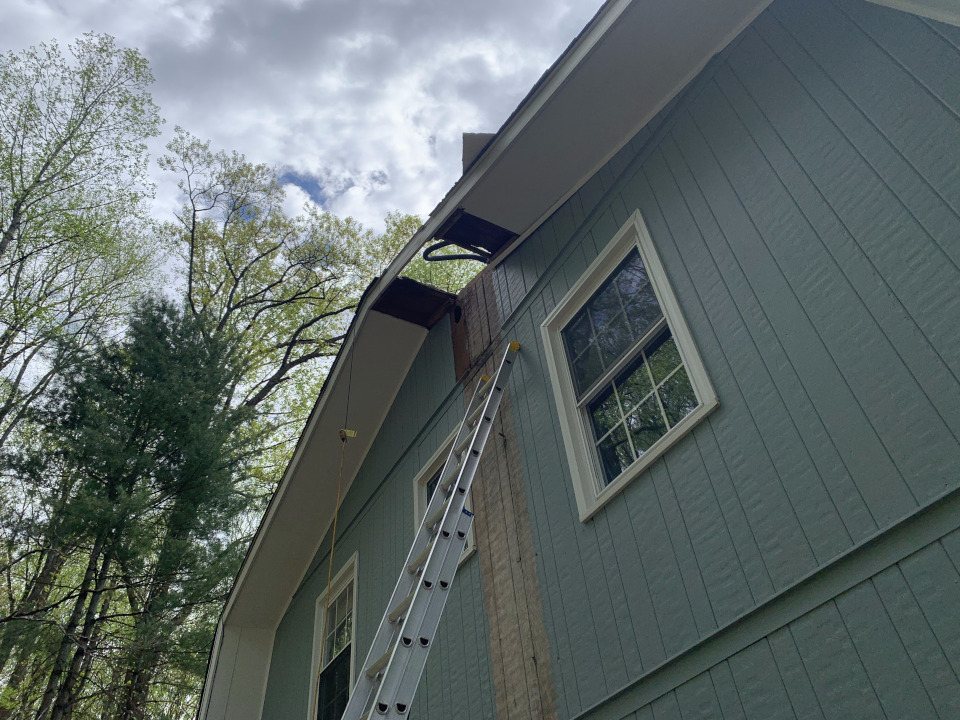
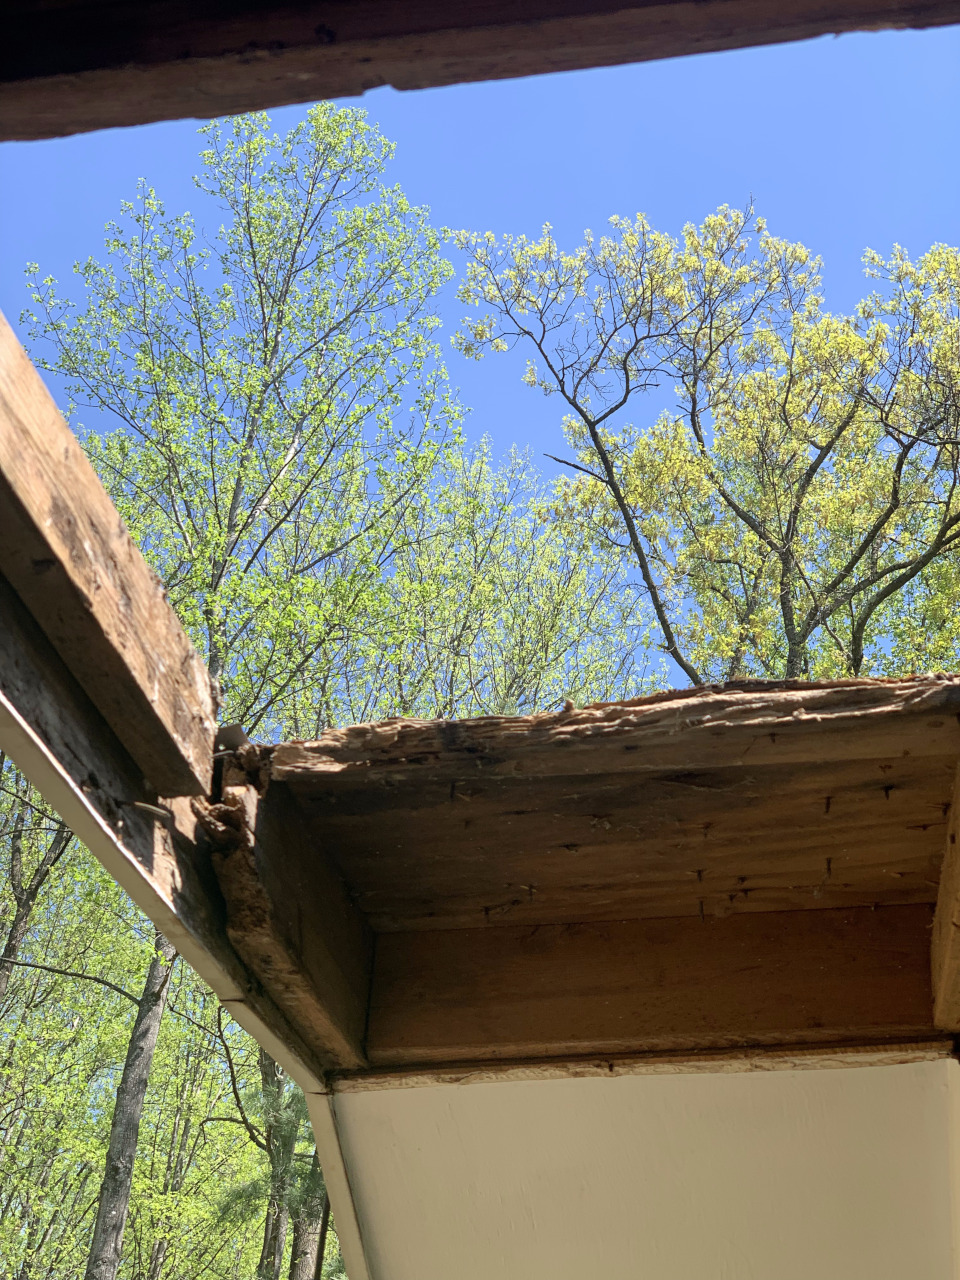
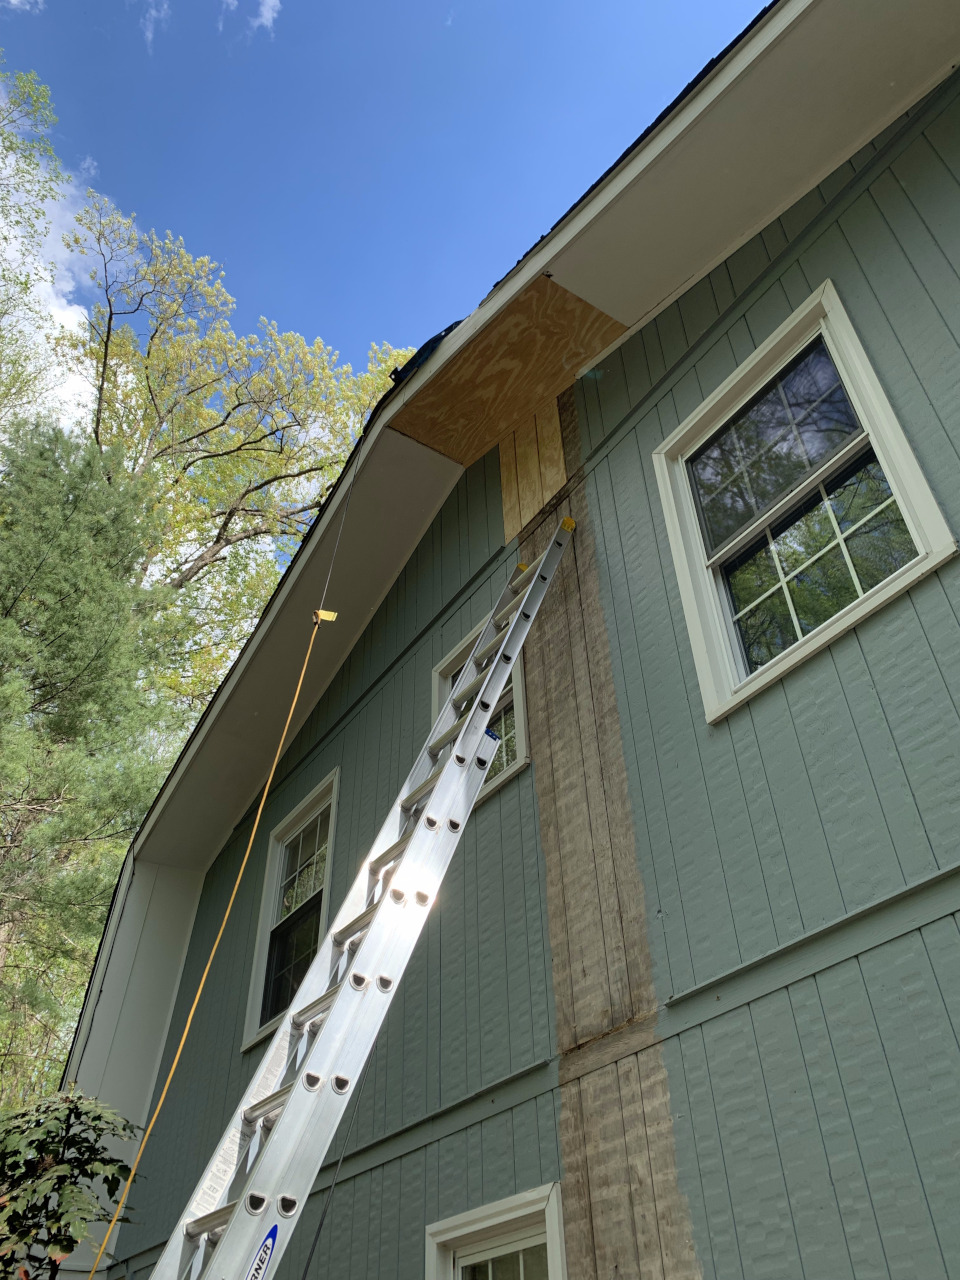
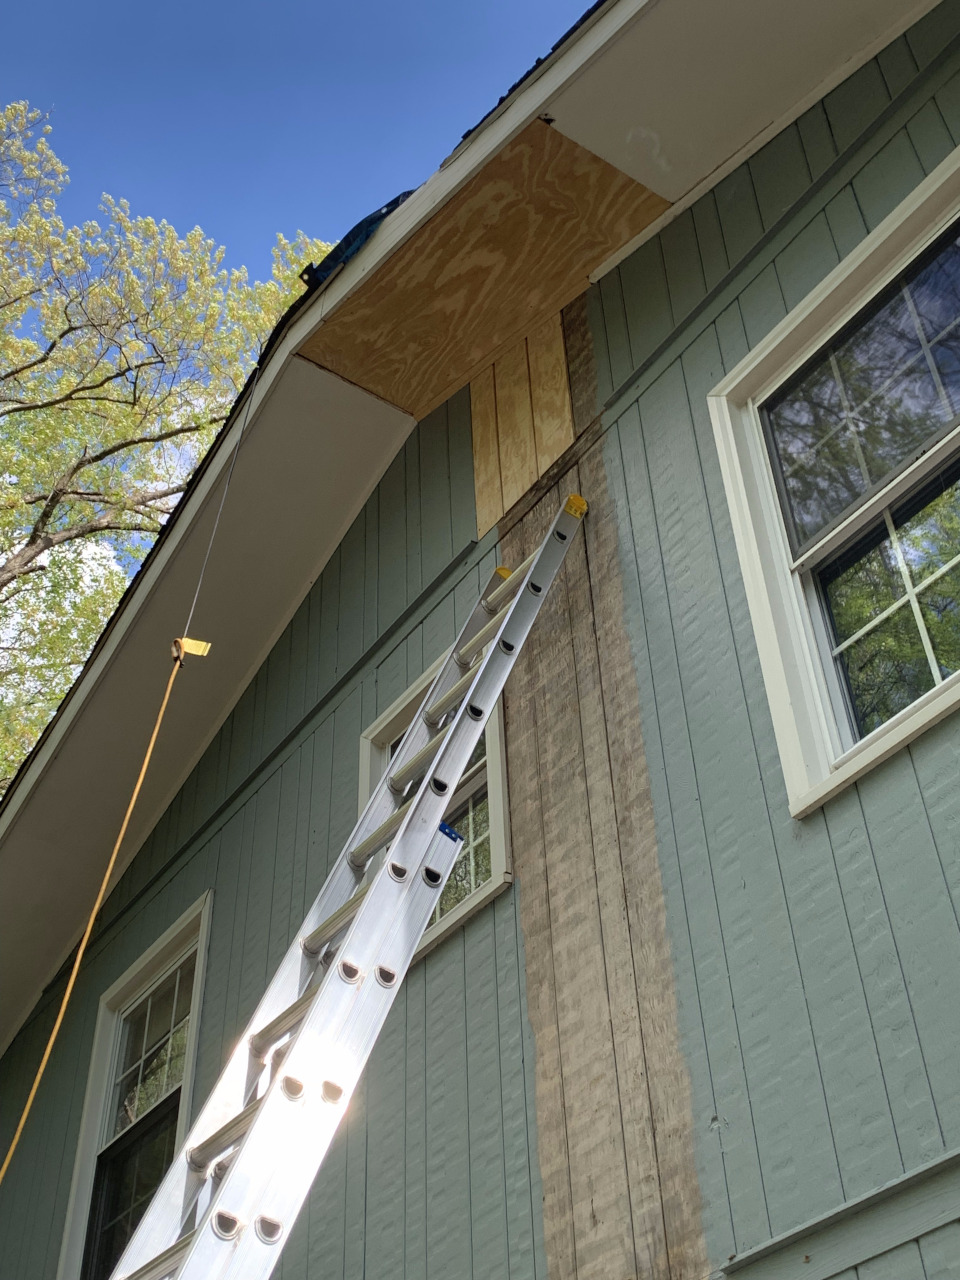
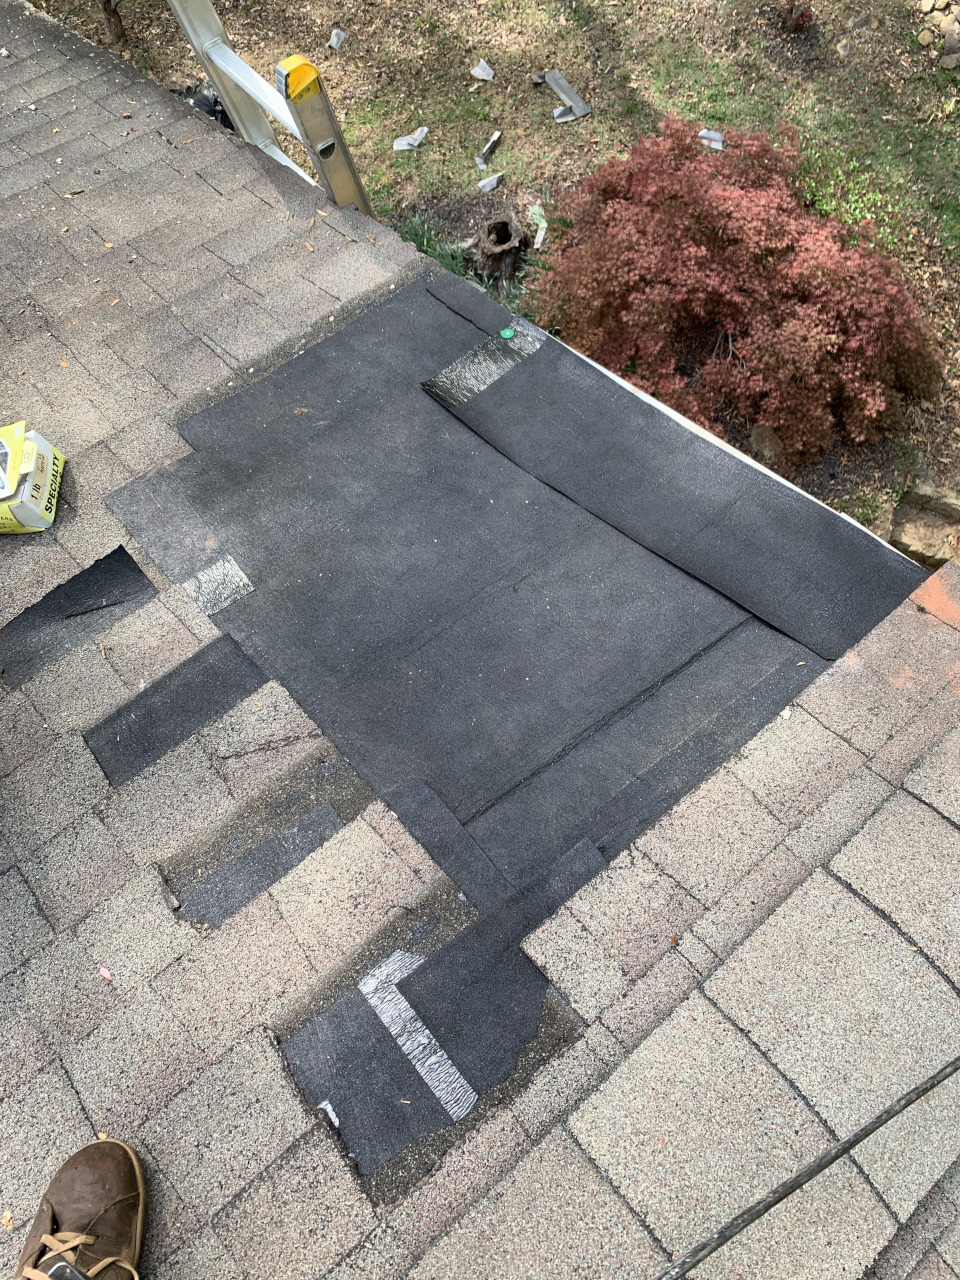
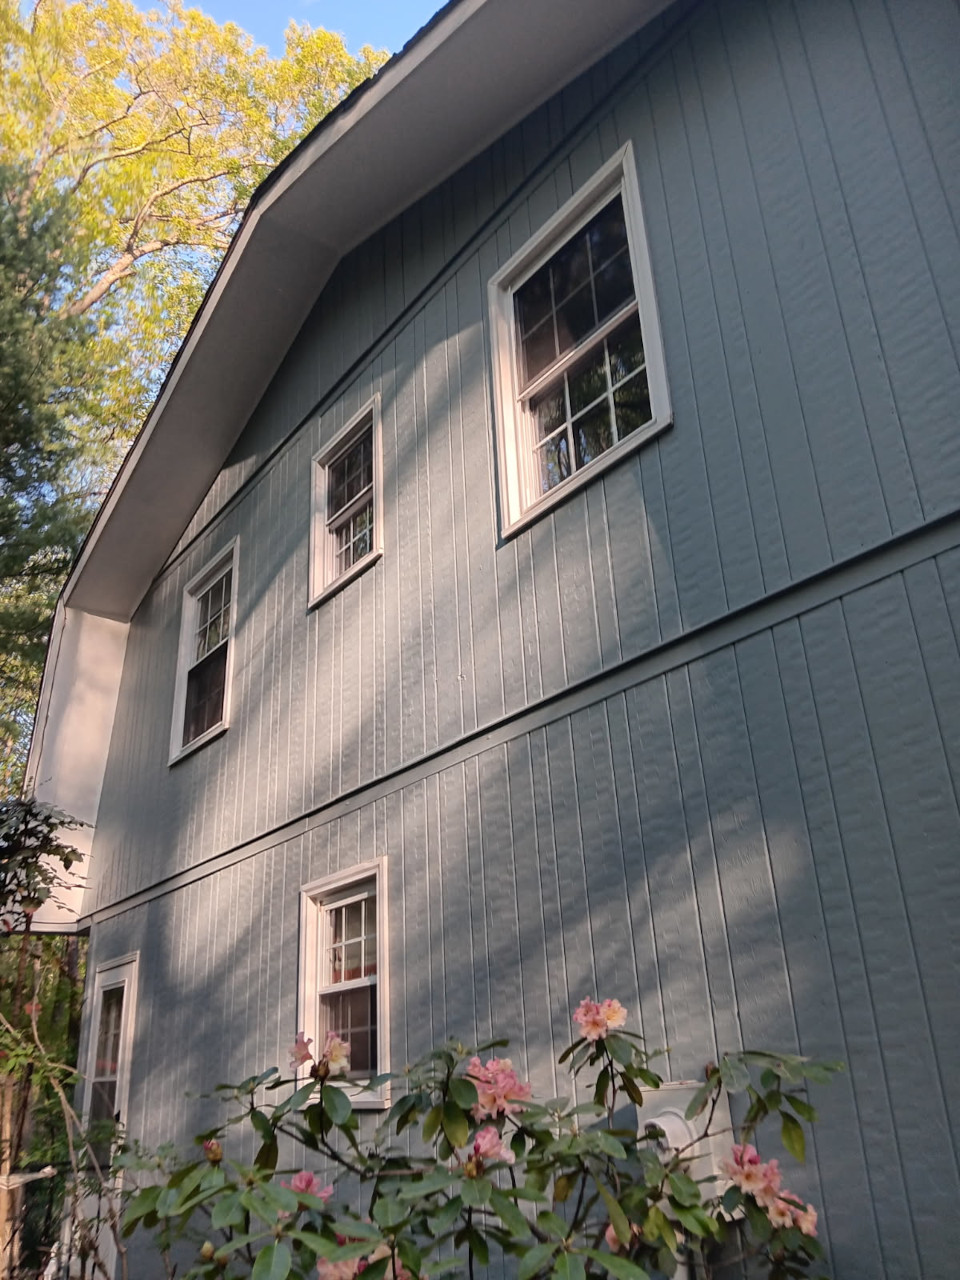
Problem: This project involved an old, unused masonry chimney that had begun to pull away from the house. The chimney had developed a pronounced outward bow at mid‑height because the metal anchors that once secured it to the structure had rusted through, leaving it largely unsupported. The only thing preventing it from tipping over was the soffit overhang it passed through, which held the upper portion in place while the base shifted due to foundation movement. This created a hazardous condition where the middle of the chimney was pushing outward under its own weight. Compounding the issue, the soffit area surrounding the chimney had extensive rot damage, which was especially concerning given that it was the last remaining point of support keeping the chimney from falling

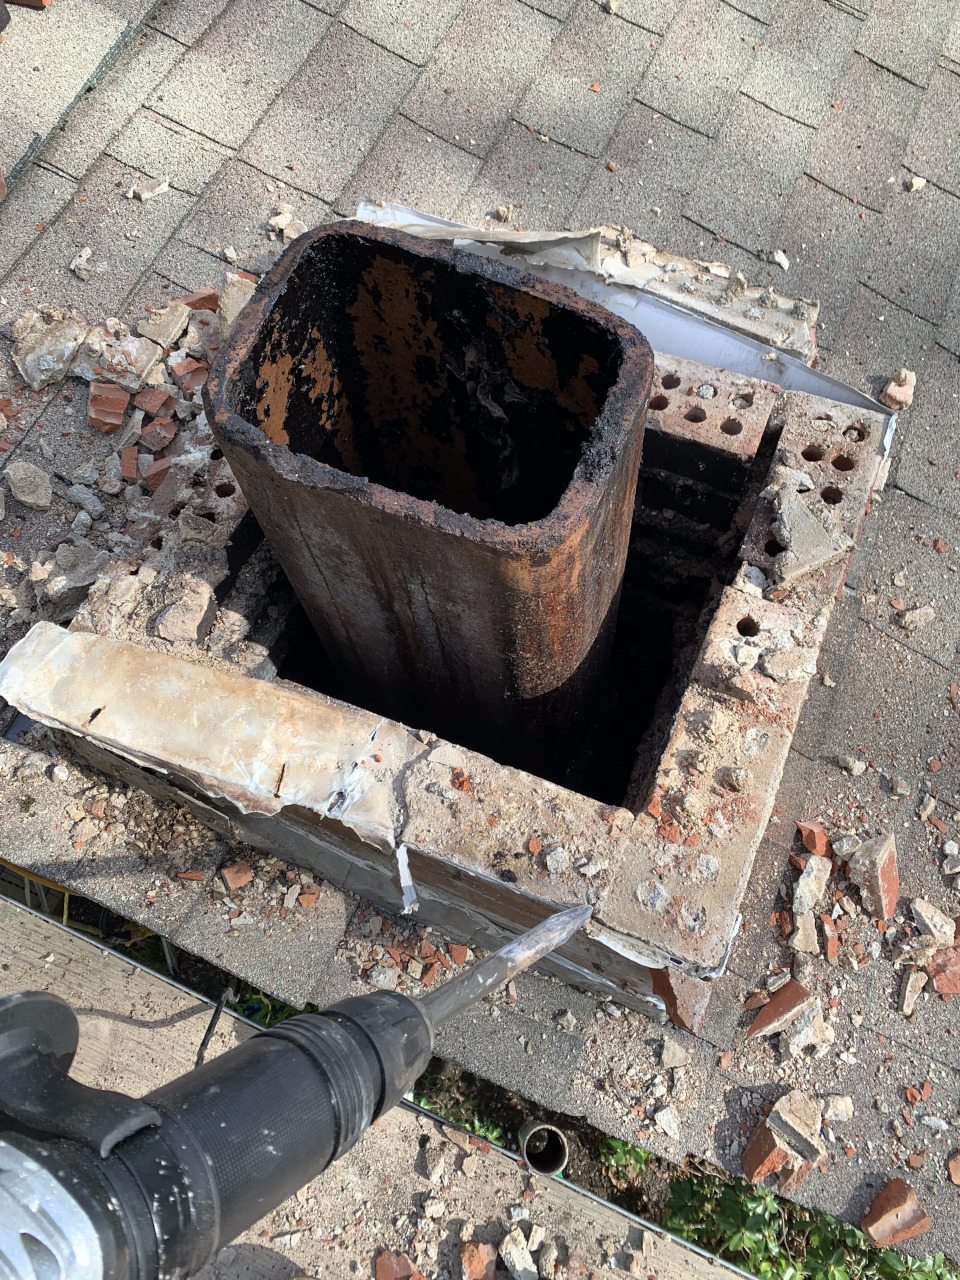
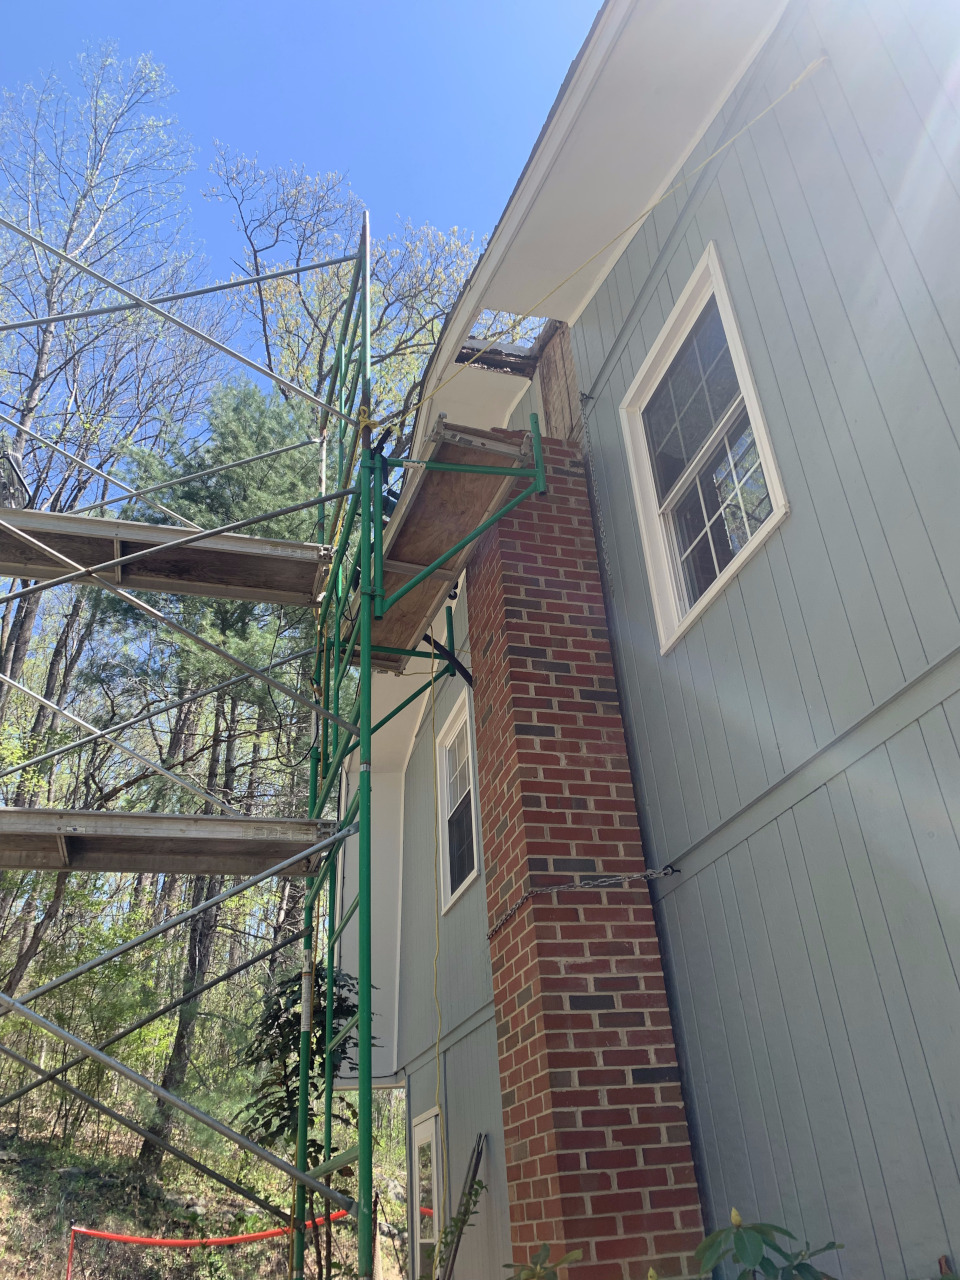
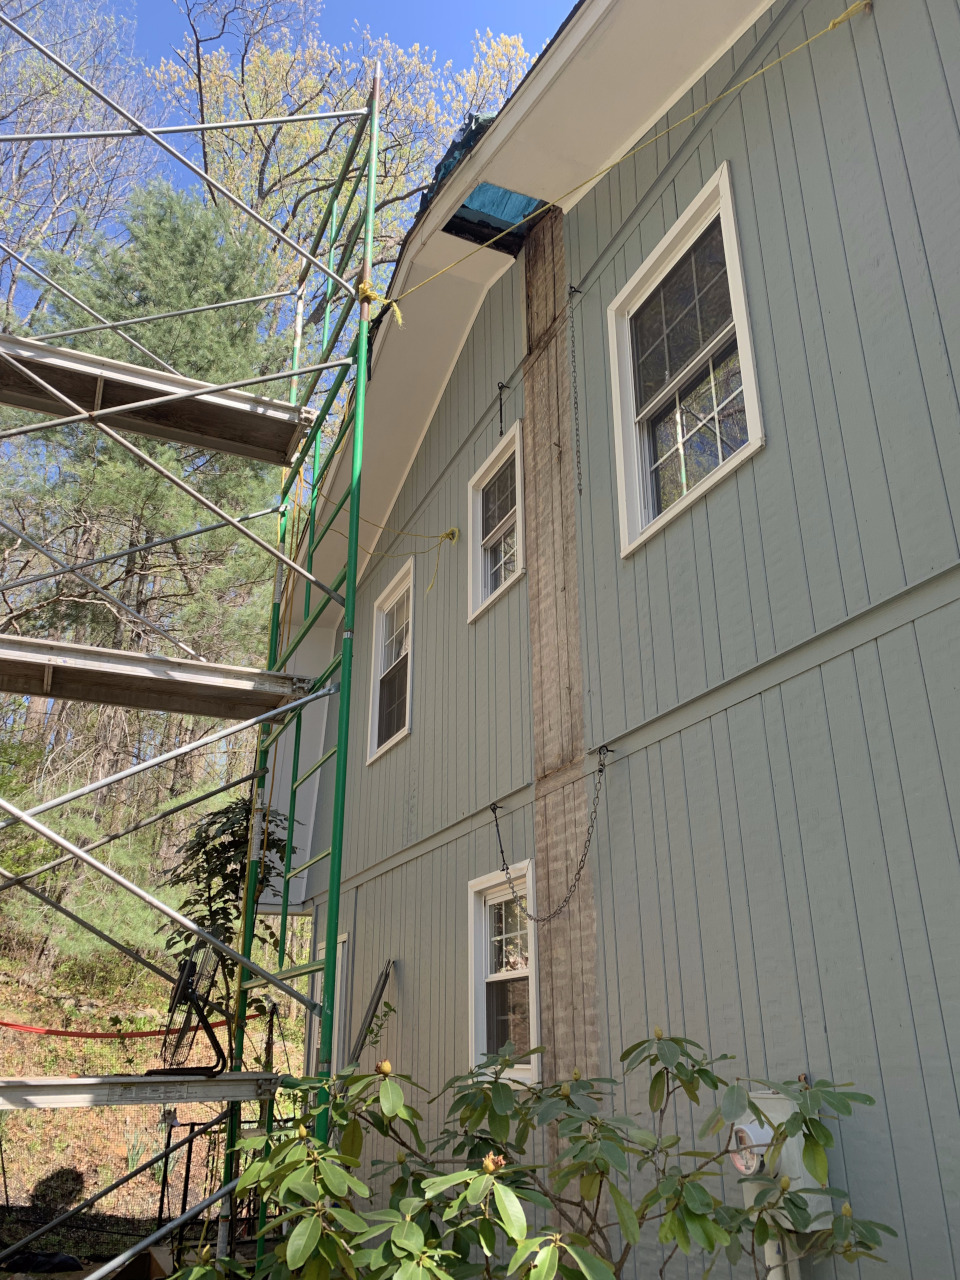
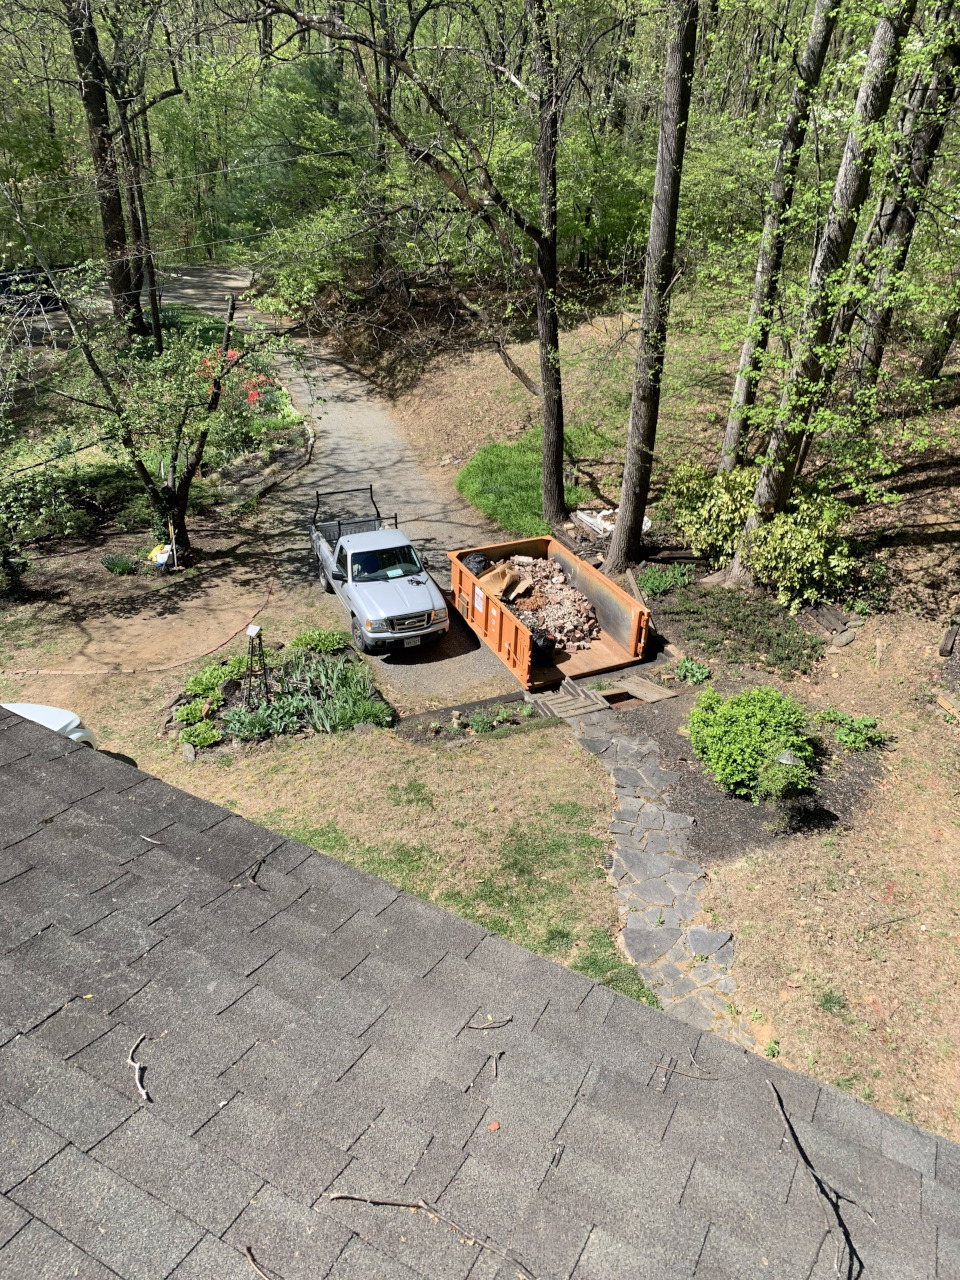
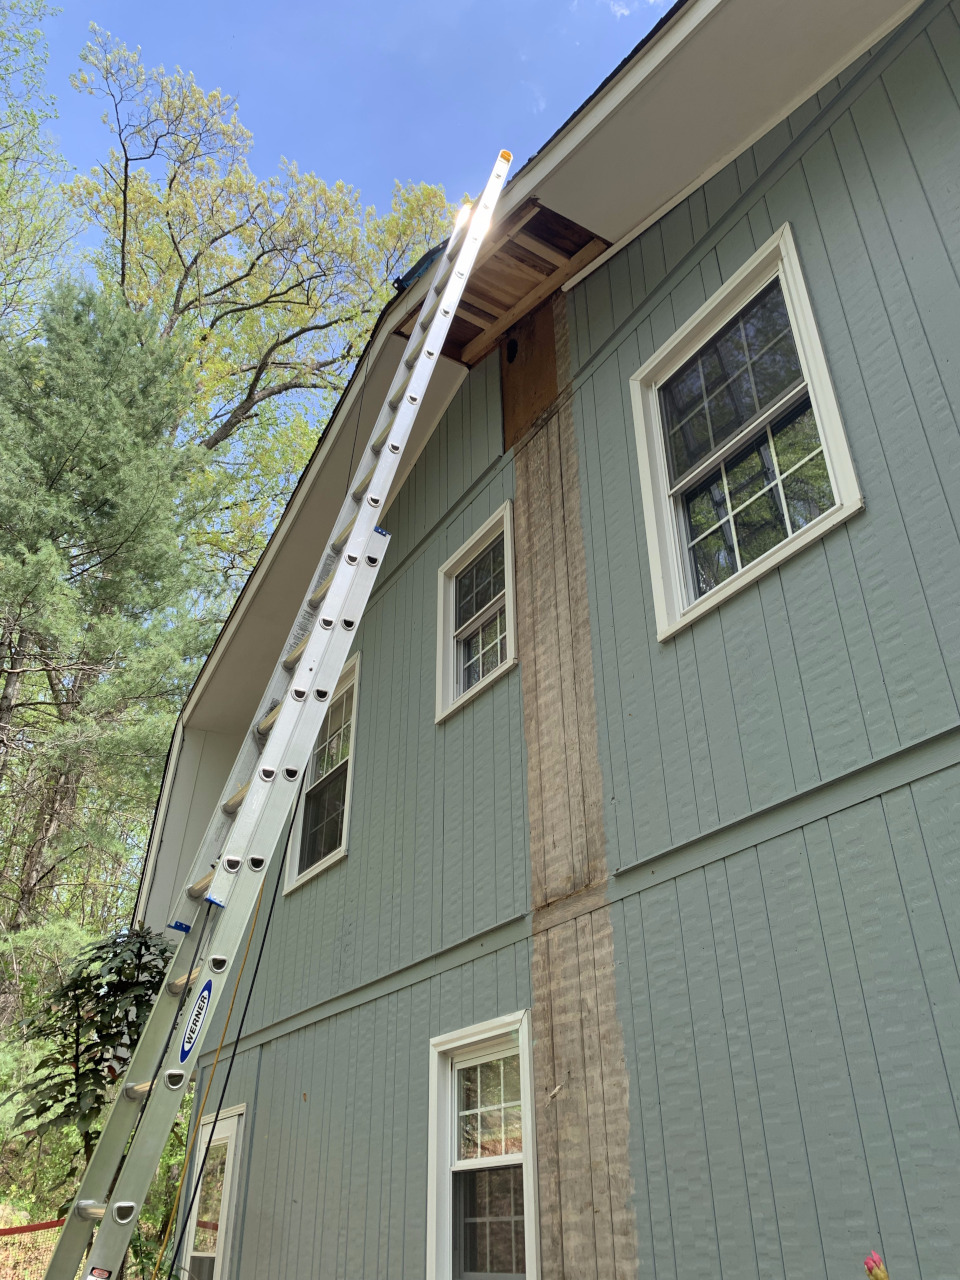
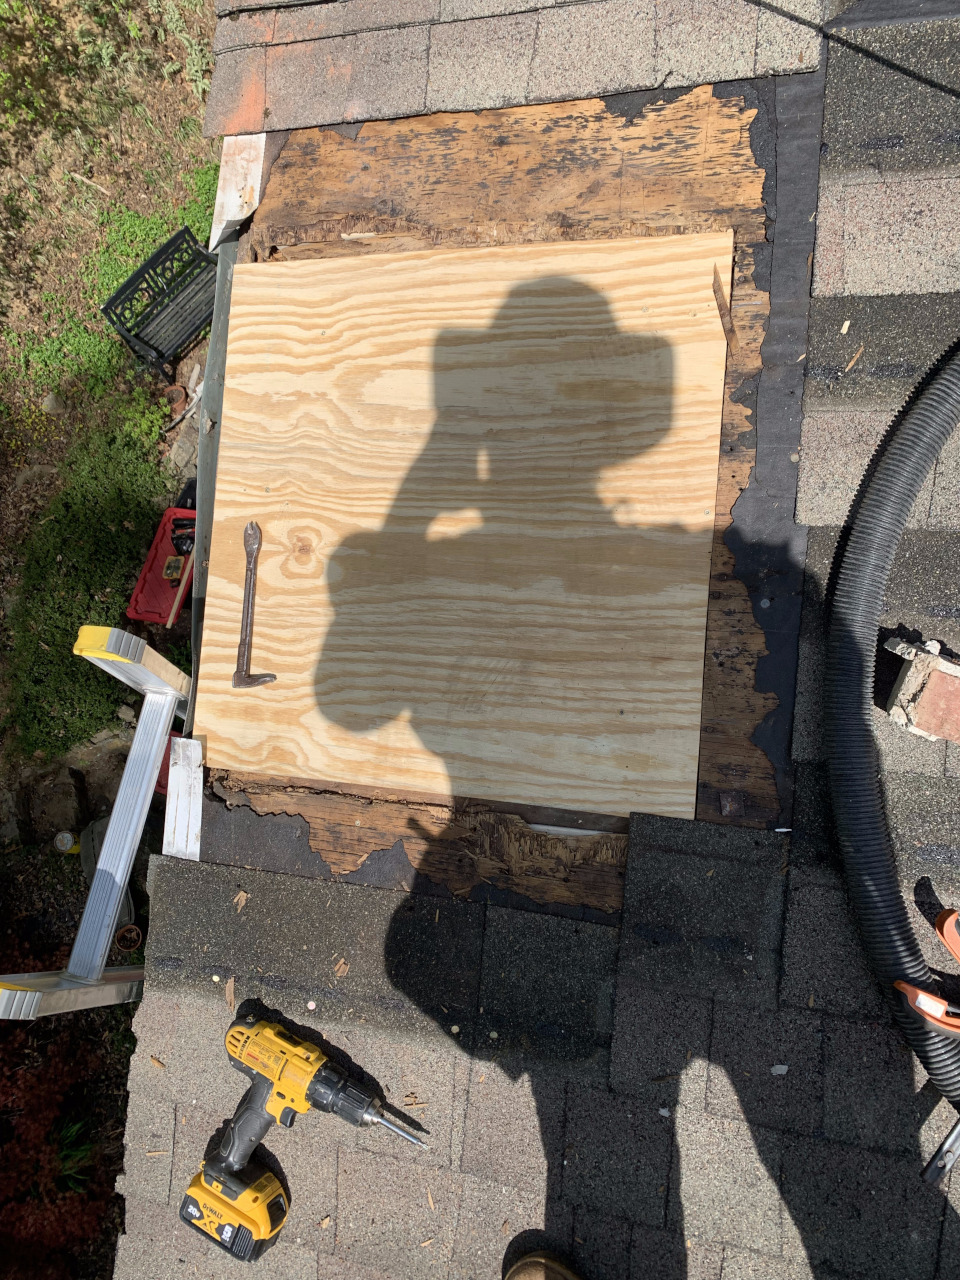
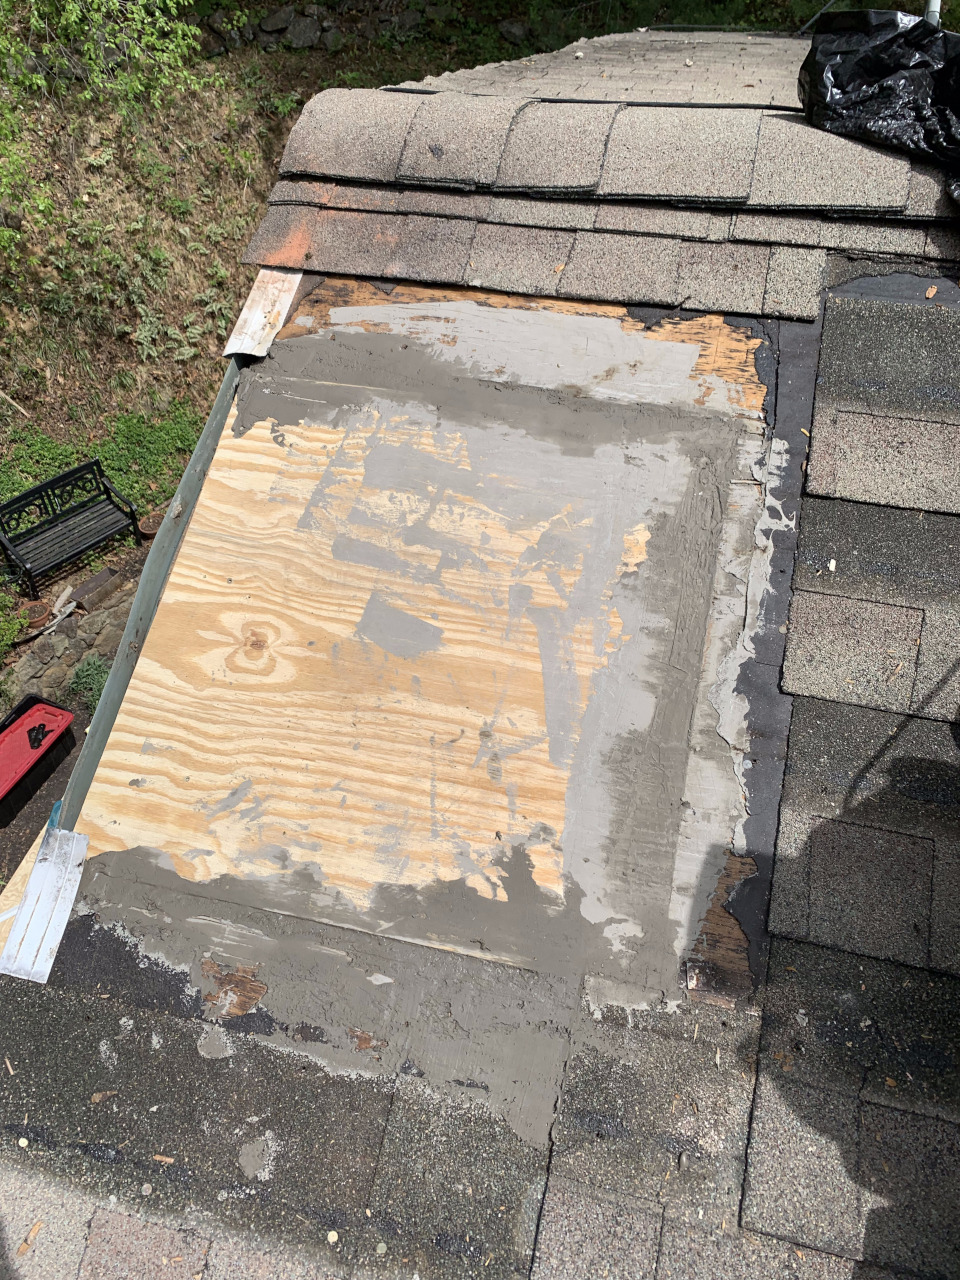
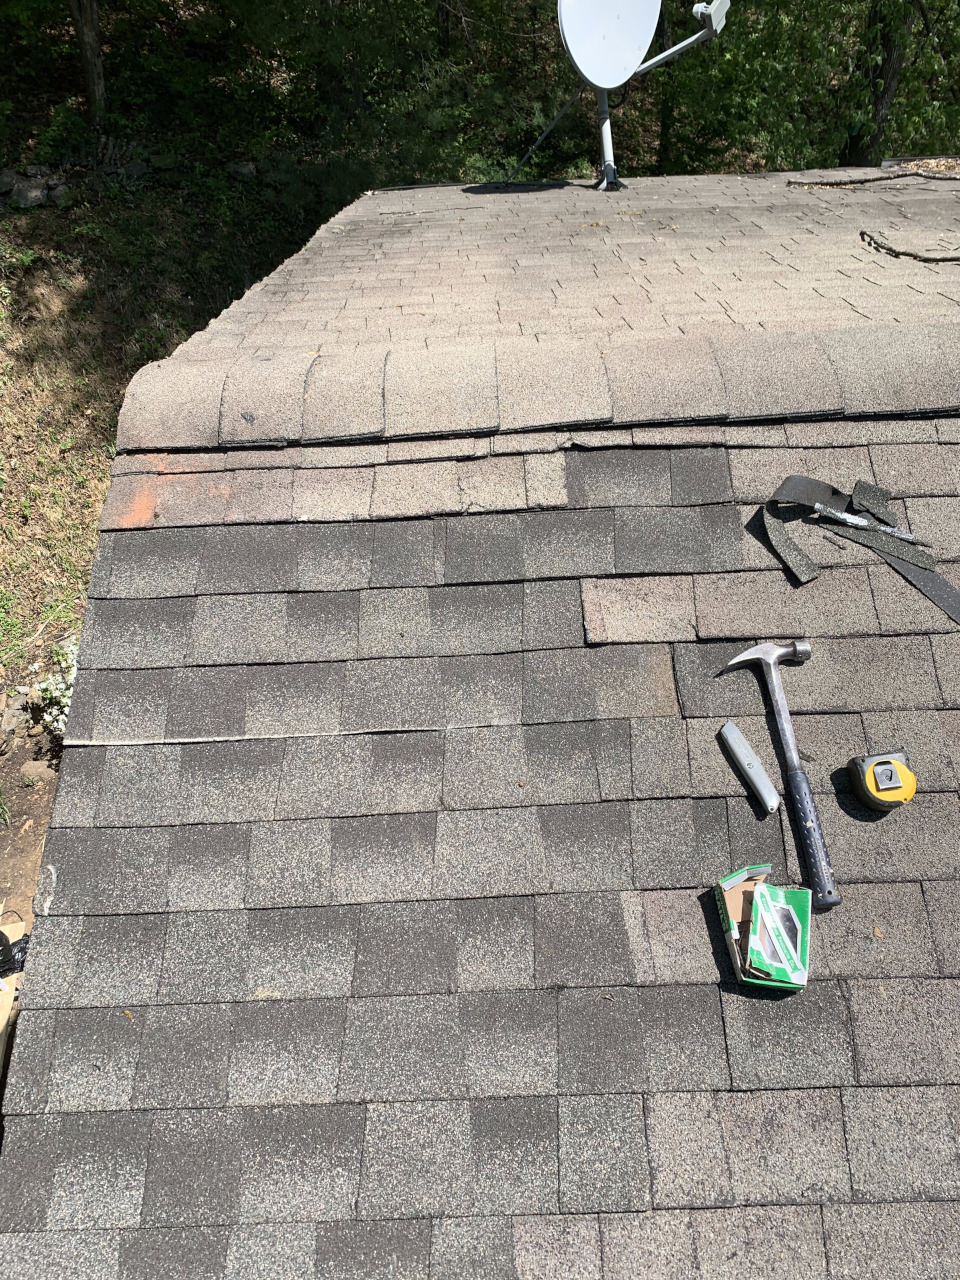
Repair: The chimney was dismantled brick by brick using scaffolding and a hammer drill, and the bricks were collected into a dumpster for disposal. To stabilize the chimney during the work, chains were tightened around the structure and fastened to the house framing with eye bolts. After the chimney bricks were safely removed, the rotted material in the soffit was cleaned up and reinforced with new framing, and the soffit and roof opening left by the chimney was closed off with plywood on both the roof side and the soffit side. The joint between the new sheathing and the existing sheathing was leveled to create a flat, stable surface, and new shingles were installed to match the existing roof. Underneath, a piece of crown molding was added on the underside to continue the existing soffit detail. A rotting section of T1‑11 siding which had been behind the chimney was replaced, and in addition, custom drip edge was fabricated from MiraTEC weather‑resistant composite to replicate and extend the original wooden drip‑edge pieces in the areas previously covered by the chimney. The repaired siding and soffit surfaces were then painted to match the existing colors.

The chimney shows visible separation from the house before work began.
Scaffolding is set up beside the chimney to provide safe access for restoration.
A walkboard is installed on the scaffold to create a stable working platform.
Chains and eyebolts secure the chimney to the house for temporary stabilization.
The top bricks are removed using a hammer drill, breaking down the chimney safely.
With part of the chimney removed, the opening through the soffit becomes visible.
The chimney fully removed.
A roof-level view shows a dumpster filled with removed chimney bricks.
Additional soffit material around the opening was removed due to rot.
A close-up of the soffit underside shows extensive rot and the thin remaining margin of material that had been supporting the chimney.
New framing has been installed to stabilize the rotted sections within the soffit.
From ground level, the new framing is visible stabilizing the rotted sections within the soffit.
New 3/8‑inch plywood has been installed to cover the soffit framing, along with crown moulding to continue the existing soffit detail.
New 3/8-inch plywood has been installed to cover the soffit framing.
The new soffit plywood is visible along with the newly installed section of T1-11 siding.
A top-down view of the roof shows a new sheathing section installed over the opening.
New shingles will be supported by a flat surface created by filling the gaps between the new sheathing section and the existing roof sheathing.
The gaps between the new sheathing section and the existing roof sheathing have been leveled to create a flat surface.
A peel-and-stick asphalt underlayment has been installed over the new sheathing section.
Shingles are installed to tie into the existing roof.
The repaired soffit and siding, along with the custom‑fabricated drip‑edge pieces, are completed and painted.
The repaired soffit and siding are completed and painted, shown from the ground.